CAMERA QUICK SETUP
1. Ensure selector switch is OFF and install 8 new AA lithium
batteries according to polarity symbols.
2. Insert an activated SIM card and formatted SD card (32GB
or smaller) into the appropriate camera slots.
3. Move the selector switch from OFF to SETUP.
4. The screen will display Checking then Searching as the
camera acquires a cellular signal.
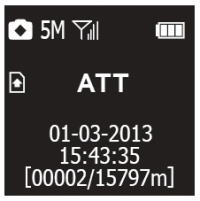
5. The camera has successfully acquired a cellular signal
when six numbers or the service provider’s initials appear on
the display. Failure to connect will prevent the camera from
sending texts and photos via MMS.

Note: Allow approximately 10-20 seconds for the camera to acquire a cellular signal. If “LOGIN FAIL” appears on the display, move the selector switch OFF and repeat steps. The 5 db booster antenna (accessory) is necessary for cellular operation in low signal areas.
6. Place the camera at the target area at least five feet above
ground level using a T-Post and T-Post Camera Mount. This
will ensure the camera has the correct angle to trigger the PIR
motion sensor and IR illuminators are above the target area.
7. Slide the selector switch from SETUP to ON. Close and
latch the camera within ten seconds before the Ambient Light
Sensor LED stops blinking red and the PIR triggers a photo.
8. Ensure the camera takes a photo to verify it is positioned
and programmed correctly. The camera will take photos or
videos based on the MENU selections. The M.I.N.E.™ Cam is
now operational and active.
NOTE: If the Ambient Light Sensor LED does not stop
blinking, the selector switch is still in the SETUP position.
The camera must be ON to function.
The M.I.N.E.™ Cam training video can be viewed online with the entire M.I.N.E.™ Trapping System video series at: www.youtube.com/JAGERPRO
.