Sidebar
INITIAL SD CARD PROGRAMMING
1. Open the camera.
2. Insert an activated SIM card and formatted SD card into the
appropriate camera slots.
3. Move the selector switch from OFF to SETUP.
4. The screen will display Checking then Searching.
5. Press the MENU button during this connecting sequence.
6. Using the arrow buttons, scroll right to the GSM tab. Then
scroll 2 clicks up until the Download Tool option is visible.
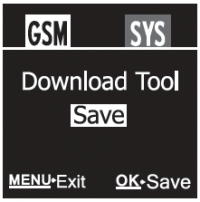
7. Press OK to SAVE the UOV Setup tool to the SD card. The
screen will revert back to the initial display.
8. Turn off the camera and eject the SD card. Insert it into a
computer SD card slot to program.
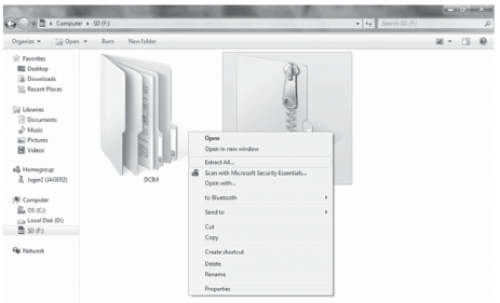
9. Open the SD card file and two folders should appear; DCIM and GSMSETUP. Right-click on the GSMSETUP file and choose “Extract All…”.
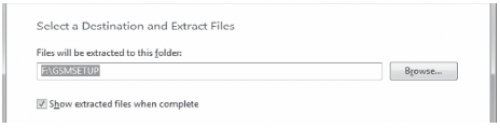
NOTE: Change the folder name by deleting GSMSETUP from
the text box. Only the drive letter of the SD card should remain
(see example below).
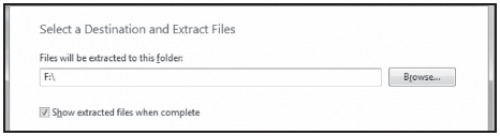
10. Click the “Extract” button.
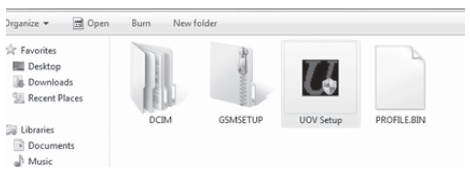
11. The three items below should appear in the SD card file.

12. Double click on the “UOV Setup” file and the below screen
should appear.
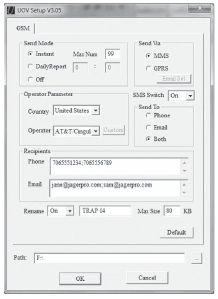
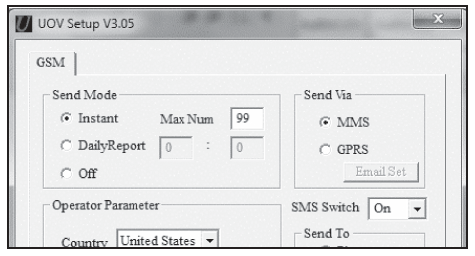
• Send Mode
Instant: (Recommended)
The camera sends a photo immediately when it takes a photo.
It will only send an SMS text message of the sequence number when a video is taken (Video: 3/99).
The Max Num field indicates the maximum number of photos or texts allowed to be sent within 24 hours.
The camera resets to zero each night at 0000 hours. Daily Report: Sends an SMS to tell how many photos and videos were captured during the past 24 hours.
In photo mode, the SMStells the accumulated picture quantity together with the latest captured picture.
In video mode, the SMS tells the accumulated video quantity only.
Off: GSM function is de-activated. Photos and videos will not
be sent to a recipient but will be saved to the SD card.
• Send Via MMS: (Recommended)
The image will be sent by text
message. The image can be sent to a cell phone, email
account or both. When checked, a minimum of one phone
number and/or one email address needs to be entered as a
recipient depending on the Send To mode chosen.
GPRS: Allows the sending of pictures via Internet connection.
This requires a data plan on the SIM card account. The image
is sent to an email address only. When checked, a minimum of
one email address needs to be entered as a recipient.
SMTP parameters need to be set up by clicking Email Set.
• SMS Switch: The SMS Switch must be ON for the camera to receive text commands from four listed phone numbers.
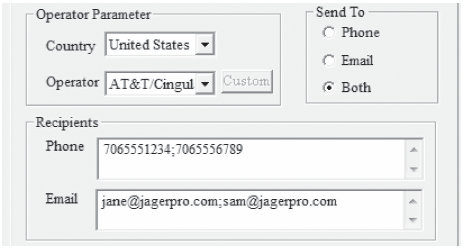
• Operator Parameter
Choose the country and GSM wireless carrier of the SIM card.
Custom must be selected if an AT&T or T-Mobile SIM card is
NOT used. Click Custom and manually input the parameters
for the URL, APN, IP and Port according to the alternate
GSM service provider settings. AT&T or T-Mobile settings are
automatic. Users must contact their network service provider
for the required settings of all other GSM wireless carriers.
Verizon, Sprint and Virgin Mobile use CDMA technology and
will not operate in this camera.
• Send To Phone: (Recommended)
A text photo will arrive to a cell
phone much faster than an email will arrive to either a
cell phone or computer provided the cell phone has good
reception. A phone number must appear in Recipients.
Email: The image will be sent to email. An email address
must appear in Recipients.
Both: The image will be sent to both a cell phone and an
email address. A cell phone number and an email address
must appear in Recipients.
• Recipients
A maximum of 4 phone numbers and/or 4 email addresses
may be added in the Recipients field.
NOTE: Use a semi colon to separate more than one email
or phone number. Do not leave any spaces between
numbers and semi colons. Ensure a semi colon is NOT
used at the end. (i.e. 7064456789;3344453456;2123450987)
Rename
When ON, up to eight letters can be entered in the field on the
right such as the example above. The name appears on every
photo which makes it easier to identify each camera site when
multiple cameras are being used.
Max Size
The allowable range is 60-200KB. We recommend 80KB
as larger files take longer to transmit and receive via SMS.
Photos are saved at 3, 5 or 8 megapixels on the SD card.
Path
The SD card folder must be selected. If not selected, browse
and click the SD card main drive root directory. Do not enter
any sub folders inside the SD card main directory. Click OK
when ready.
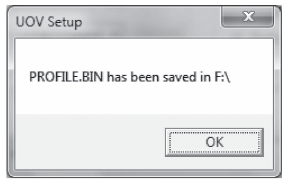
13. Click OK when you see a pop up window stating the PROFILE.BIN has been saved onto the SD card.
SD Card Programming Complete
The SD card has been properly programmed when an icon
named PROFILE.BIN is visible on the SD card screen.
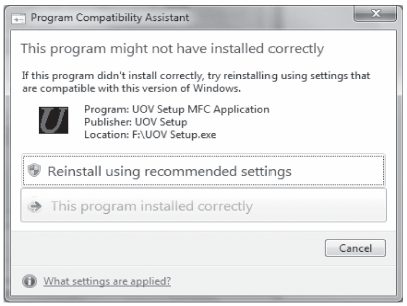
NOTE: Click on “This program installed correctly” if the
above pop up window appears after step 13.
14. Eject SD card from the computer and insert into camera.
15. Move the selector switch from OFF to SETUP. The camera
screen will display “Update Success” after 2 or 3 seconds.
.
Page Tools
